Tiny “Baubles”

Tiny “Baubles”

I’ve been at it again………………

……..remember when I added magnets to faux flowers and added them to lamp shades?

If not, you can see that post HERE!

This time, I’m using old button covers!

IMG_8763

Remember when button covers were all the rage?  Not so much anymore, right? So, they’re easy to find at thrift stores and flea markets!

I picked up these at the thrift store I volunteer at!  I bought the whole zip loc bag for $3!

IMG_8764

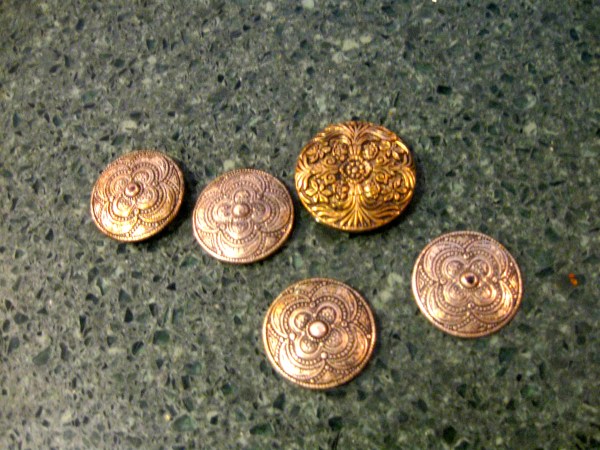
For today’s project, I’m working with these five!

IMG_8767

Please excuse the blurry picture.  My older hands just ain’t sturdy anymore and hubby was nowhere to be found to take the picture for me!

I removed the button cover “attachment” from the back of the button by using a sharp knife and “popping” it off!

IMG_8768

These were very simple to remove as they were just hot glued on.

IMG_8769

Once I popped them off, I hot glued a magnet (you know how I love my magnets!) to the back of the button cover.

IMG_8874

That’s It!!!  Another EASY PEASY!

:)

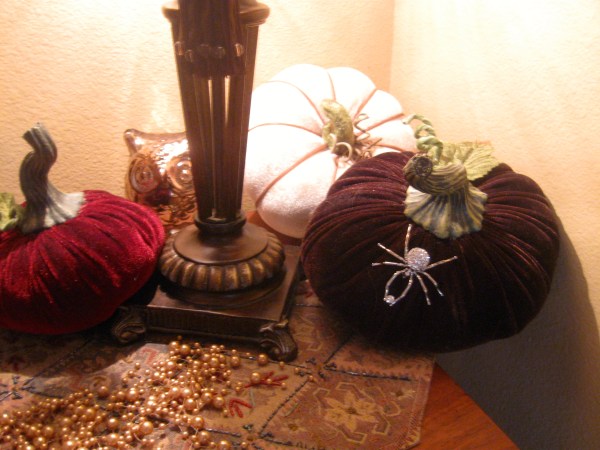
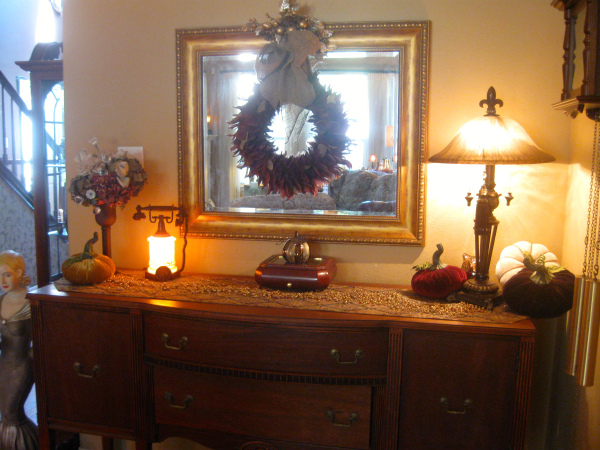
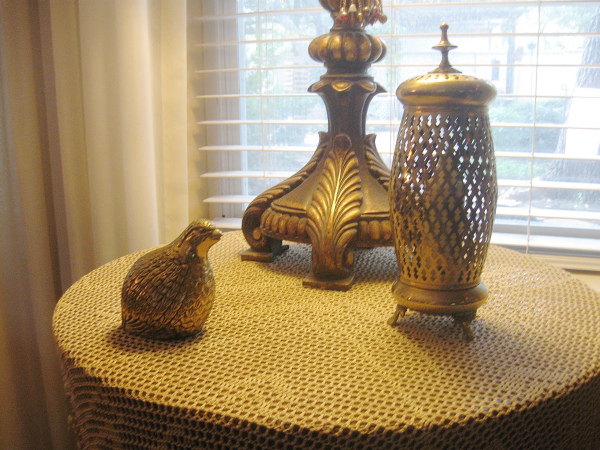
Here is my victim for these new magnets…….

IMG_8775

This lamp is situated in the middle of my living room and you can see this seam when you walk into the house!

IMG_8873

By simply adding the magnets to the seam by placing another magnet on the inside of the shade gave my lamp a finished look!

IMG_8772

IMG_8774

Think of the possibilities!

I took one button and added a magnet to it and “popped” it on my antique scale.

IMG_8795

 I didn’t need a second magnet as the scale is metal and the magnet stuck to it just fine!

IMG_8794

 I love the vintage look and how it changes the look “just a little”.

IMG_8793

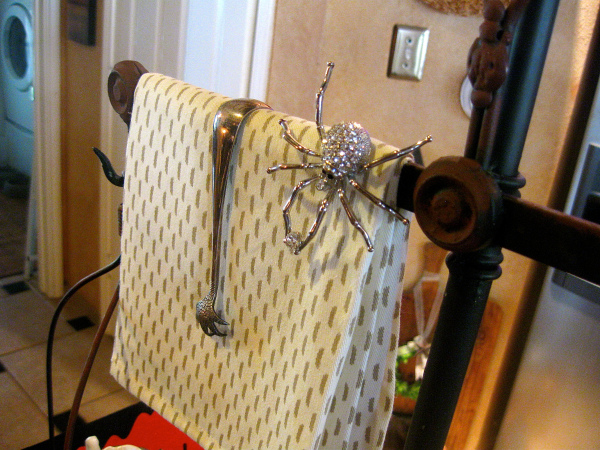
Don’t forget you can embellish with brooches too! I picked this one up at the Thrift Store too.

IMG_8789

I just pinned it to my lampshade in my laundry room!

IMG_8791

Remember, it’s all in the details!!

Hope you’re having a fantastic day!

http___signatures.mylivesignature.com_54492_67_2919C051256D8441C775E700F88490B0

Just a little “boo”!

Just a little “boo”!

Just a few added touches for “All Hallows Eve” at the Manor this year…….

IMG_8627

My crystal spiders are out again!!

IMG_8683 IMG_8681

IMG_8716

I left my mantel “as is”.  I think it’s dark and creepy enough!

IMG_8668

I just added a few things to the area around the hearth.

IMG_8669 IMG_8674IMG_8665

Remember my Doctor Bag Vignette?

IMG_8629

I added a ceramic crow and some orange mercury glass apples……

IMG_8632

….and opened my Edgar Allen Poe book up to The Raven.  Another spider is perfect!!

IMG_8636

I found this cute little lamp at Home Goods……perfect little light!

IMG_8639

I added Halloween straws in a glass vase (all found at Dollar Tree) for a subtle touch.

IMG_8686

And the top of the fridge holds a couple of favorite pumpkin lamps!

IMG_8866 IMG_8869

I hope y’all have a wonderfully safe

Happy Halloween!

http___signatures.mylivesignature.com_54492_67_2919C051256D8441C775E700F88490B0

Fall Around the Manor

Fall Around the Manor

I absolutely love this time of year………

……it’s a slow change in temperatures for us in South Texas but occasionally, we have a humid free day that let’s us know….

……..change is coming!!

;)

I thought I would share the fall touches around the Manor……..

…….keeping things simpler this year, at least for me!

I hope you enjoy!

IMG_8619

I tried my first attempt at adding a tray to my round coffee table.  I added an antique orange mercury glass candlestick with a battery operated candle on top (love those….can never have enough!) along with my glass pumpkin.

IMG_8621

I tried to bring in more texture by adding some orbs covered in bark along with some green beaded garland for “fallish” color.

IMG_8626

I placed my velvet pumpkins on the sideboard.

IMG_8625

Another decoration I absolutely love….
IMG_8623

Just adding some fall potpourri and a burlap flower to my bowl……

IMG_8646

….plays against the flicker of the lantern taking my church pew into Fall!

IMG_8647

A simple ceramic pumpkin in a beautiful chartreuse green…..

IMG_8650

…..says “fall” when visitors arrive!  Remember, sometimes less is more!

IMG_8648

I added a faux white pumpkin to my olive basket….

IMG_8659

…..with, of course, faux olive branches, and a little burlap!

IMG_8662

The fall mantle is very simple and much like last years.

IMG_8668

The kitchen/computer area was fun to decorate.  I picked up the framed images of fall at the thrift shop I volunteer at!

IMG_8717

My trio of pumpkins were surrounded by orange pip berries (also purchased at the thrift shop)!

IMG_8717

Adding more fall picks and a ceramic pumpkin from Bath and Body Works …..

IMG_8700

…..along with a cream sunflower from the Dollar Tree, completes the look!

More small touches in the kitchen bring us to a close…….

IMG_8707

Adding miniature pumpkins to a Dollar Tree vase……

IMG_8708

along with other added fall pieces and candles on my tiered serving piece is just enough this year!

IMG_8711

Another cream sunflower and ceramic pumpkin from Dollar Tree are perfect in the coffee corner!

IMG_8714

I placed a faux mum with some faux pumpkins and gourds along with wooden accessories and a pumpkin towel found on clearance last year at Pottery Barn to my salad bowl and stand!

See the tiny crystal spider attached to the mum?  Yes, I’ve added those that I used last year.

IMG_8716

That post is next!

I hope y’all are enjoying this season as much as I am.  It is the start of a magical time in my opinion!!!

Happy Fall Y’all!

 http___signatures.mylivesignature.com_54492_67_2919C051256D8441C775E700F88490B0


Fall Porch 2014

Fall Porch 2014

Gosh, I can hardly believe it’s October!!!

I must admit I LOVE IT!!!

It’s hard to find someone who doesn’t love Fall what with all the smells and colors and temperatures finally beginning to drop (a little)!

The Fall Porch is finally complete!

:)

IMG_8462

I had the most fun making these pillows for Plaid.  You can see that post HERE!

IMG_8543

I added a little fall color to the entry stairs….

IMG_8534

…….it’s amazing what a little “dash” of color will do!!

IMG_8498

My door wreaths were super easy to make.  You can see how I did it with the help of Laura from Top This Top That’s wreath tutorial!

IMG_8502

I put the black and white pillows along with last years fall pillows on the swing!

IMG_8556

I never get tired of classic black & white!! This year I added some burlap pumpkin pillows to the mix!

IMG_8569

IMG_8571

They’re cute and fun and can stay there through November!

Of course, little touches are scattered here and there.

IMG_8494

I took my daughter’s rubber cowboy boots and added some fall foliage along with a pretty ribbon….

IMG_8474

….and placed them next to my sandwich board with a simple seasonal sentiment!

IMG_8549

My mini goat wagon got a touch of hay, ghords, an extra little pillow and a battery operated candle lantern!

IMG_8597

A very simple vignette in the corner that definitely says “fall”!

IMG_8595

I updated my pie basket by adding more foliage, some Dollar Tree pumpkins painted white and another candle lantern!

IMG_8593 IMG_8603

Just adding a few metal leaf sprigs into my faux greenery turned this corner into fall.

IMG_8581

Last, I added a two more fake pumpkins from Dollar Tree that I painted white and stained with dark wax to the fern on the other side of the front doors!  I LOVE Dollar Tree’s pumpkins!! A stained glass lantern and a cream “funkin”, which I also stained rounded out the look.

IMG_8612

IMG_8615

I just stuck the “R” sticker (you can find these at Hobby Lobby) on the pumpkin!

IMG_8617

Today, I turned my lantern around to show the “jack-o-lantern” side!

IMG_8604 IMG_8608

That rounds out the porch!  Hope y’all are enjoying your Fall!  We were finally able to open some windows yesterday and air out the house!

WOO HOO!!!

IMG_8475

:)

Until next time……….

http___signatures.mylivesignature.com_54492_67_2919C051256D8441C775E700F88490B0

Easy Fall Wreath!

Easy Fall Wreath!

EASY is my motto this year especially with volunteering and being away from the house more…….

EASY is my favorite word!!

IMG_8502

I needed wreaths for my front doors but wanted to keep it simple and EASY!!

 First I made a burlap wreath using a wire frame like this.

bevfabriccrafts_2269_267929600_260

Source

I followed Laura of Top This Top That‘s tutorial on making a burlap wreath. I used four rolls of burlap ribbon per 20″ wire wreath.  Her directions are perfect and it’s so easy to make a perfect wreath!

I knew I wanted to embellish them a little (’cause don’t we all embellish everything?)!!  But remember, EASY is my motto this year!

IMG_8498

I had these two berry/ball wreaths in the closet that I haven’t used for a few years.

IMG_8491

I basically just pushed them inside the wire form and adjusted the burlap.

Now that’s EASY!!!

IMG_8502

Thanks, Laura, for a wonderful tutorial!!! If you don’t know Laura, definitely check out her blog, Top This Top That!  You’ll love her!  I especially love when she chats about her donkey!!

Have a great day and remember, keep life simple……

….and decorating EASY!!

Until next time…….

http___signatures.mylivesignature.com_54492_67_2919C051256D8441C775E700F88490B0

Adding Fall Color!

Adding Fall Color!

adding fall color

After finishing up the Fall touches on the front porch, I decided my urns and “orbs” needed a little something, something….

IMG_8492

Y’all know how I love my Orbs!!!  Last year, they were a different color….

IMG_5591

I decided to change them from black to cream and I have really enjoyed the change but when I set the white pumpkins in the cream orbs, they kinda disappeared.  So, I had to come up with a new idea!

I needed a little color!!!

IMG_8541

I purchased 2 large candle ring wreaths and 4 small candle ring wreaths that were 40% off at Hobby Lobby.

IMG_8515

I cut them in half……

IMG_8518

I simply placed the two halves of the larger wreaths into the orbs

IMG_8523

…..and placed my faux greenery orbs back in!

IMG_8525

I did the same thing with the small halves by placing them in the smaller urns and placing those greenery orbs on top!

IMG_8539

It was just the right amount of color and I love the green and orange together.  I think it’s a great way to transition from summer to fall since our temperatures are still topping 90 degrees!

IMG_8534

Sometimes I tend to over think decorating.  This was so simple and inexpensive.  I spent a total of $20 and I think it created a major impact!

The “Summer to Fall” Porch is just about complete!  Now, if only our temperatures could fall too!

Until next time……….

http___signatures.mylivesignature.com_54492_67_2919C051256D8441C775E700F88490B0

Easy Stencil Pillow!!

Easy Stencil Pillow!!


This is a sponsored post by BluePrint Social, Plaid and FolkArt Stencils and Paints.  Although I was compensated, all opinions are 100% mine.  

Stencil pillow

Y’all know how I love to decorate my front porch for the seasons, so when a box of FolkArt Stencils and Paints arrived at my door, I was so excited to create a new look for Fall!!!

IMG_8411 IMG_8415

The selection of colors I received are so vibrant and perfect for fall and since you can buy all of them, and more, at Michaels, it’s so easy to create something beautiful yourself!

I decided to create a couple of pillows for my rockers.  I used two muslim pillow covers I already had and began creating!

IMG_8435

First, I applied the FolkArt Stencil Adhesive to the stencil.  I love this adhesive!!!!  It’s so easy and simple to use and cleans up with soap and water!  Just follow the directions on the package and it’s a breeze!  Once I applied it, the stencil was repositionable and I didn’t have apply to any more for the whole pillow!

IMG_8440 IMG_8438

Now the fun began!

IMG_8445

Next, I began painting! I decided to use all the colors except blue…..(I’ll save that for another time)!  In addition, I created another color by mixing Engine Red and Fresh Foliage Green to create a brown!

IMG_8441

The paints mix so well and don’t dry too quickly so I had plenty of time to create!!

IMG_8444

So super simple. After painting a different color in each circle, I then easily repositioned my stencil to the next section of my pillow cover and repeated step two.  The quality of the FolkArt Painting Stencil is amazing!  They’re durable laser cut designs that adhere securely with the stencil adhesive and wash up beautifully.

IMG_8447

Wallah!!

IMG_8450

The colors are so vibrant and beautiful.  The paint is not stiff and the pillow still feels soft!

IMG_8452

Since these paints are “multi-surface,” I decided to give another surface a try!

I had some grapevine “mini” balls that I painted to coordinate with the “dots” of the stencil!

IMG_8455

Again, very easy to work with!  The paint just glides on with no dripping or splattering!

IMG_8460

Putting it all together was so much fun!

IMG_8484

The pillows are perfect for the transition from summer to fall!

IMG_8470

After removing the stems from the grapevine orbs, they look great in a glass cylinder vase.

IMG_8471

I even had some paint leftover to stencil a ribbon which I tied around the lamp!

IMG_8484

The porch is ready for fall!!

I would highly recommend trying the FolkArt Multi Surface Paints, Stencils and Adhesive!!

For more information on these products, check out their media links:

The Plaid Palette Blog

Plaid Newsletter

Pinterest

Facebook

Instagram

Twitter

YouTube

Google+

Until next time……..

http___signatures.mylivesignature.com_54492_67_2919C051256D8441C775E700F88490B0

Thrift Shopping!!!

Thrift Shopping!!!

I know I’ve been a little “absent” from the blogging world lately…..

have you noticed?

I HOPE SO!!!!!

:)

Actually, I miss it terribly and have no plans to fall to the wayside anytime soon but I’ve taken on a new adventure!!!

VOLUNTEERING!!

I’m volunteering at the local military thrift shop and……

I LOVE IT!!!!

The only hard part is finding time to fit it all in……..and not spending too much money!!!

I think I’m their best customer!!!!

:)

That’s okay…..it’s for a wonderful cause!!!

So, I’m trying to organize my time better and will get my act together soon….

I hope!!!

:)

Meanwhile…….

I thought I’d show you a few “treasures” I’ve found at the thrift shop.

I picked up this guy for $15!!  He holds our towels when we’re in the hot tub!

IMG_0822

This flower-pot was $10! It’s huge and very heavy!!

IMG_0818

Here is a bamboo bird house.  I added three faux candles with timers.  It’s very pretty at night!!

IMG_0812

This little brass hanger was .50!!

IMG_8389

This is a beautiful ornate candle holder and bird in brass.  I think they set me back $5!!

IMG_8401

I love the detail!!!

IMG_8405

Here is a crystal ashtray but I think I’ll set candy in it!

IMG_8407

Finally, for today, I picked up a couple of lamps!  You can never have too many lamps, I say!!

This one is crystal with a brass bottom.  The sticker on the glass said “Poland”.  I believe I paid $15!

IMG_8400

IMG_8397

This cute little telephone lamp is whimsical and fun!

IMG_8421 IMG_8418

I honestly don’t know if I can shop regular retail anymore!!!!!  I love a bargain and repurposing things!

How about you?  Do you love thrifting?

I have more treasures to share but that’s for another day!!

Until next time……

http___signatures.mylivesignature.com_54492_67_2919C051256D8441C775E700F88490B0

I’m being featured at From My Front Porch to Yours!!

I’m being featured at From My Front Porch to Yours!!

I’m so excited!!!

Today, Pamela of From My Front Porch to Yours is featuring my little ole’ blog in her series “How I Found My Style Sundays”!!!

3c587f8e1580df6a59222685b49683a0

I’d love it if you’d hop over to her blog and check it out!!!

Thanks, Pamela!!!

Have a wonderful day, everyone!!!

http___signatures.mylivesignature.com_54492_67_2919C051256D8441C775E700F88490B0


This post brought to you by the letter “R”!

This post brought to you by the letter “R”!

This is going to be a very, very short post!

Why?

Because I forgot to take pictures of the “during” process!  I get so frustrated with myself when I do that!!! I just get rolling on something and the next thing I know, I’m done…….without pictures!!

Oh, well.  I think you’ll get the gist of my project anyway!!

:)

I love the trend of initials in design and I’ve been keeping my eye out for one that met my “criteria”!

I hadn’t had much luck til I was in a craft store recently and wandered down the “clearance-80% off” aisle!

There she was…………

IMG_8265

She was the perfect size, font shape and thickness I wanted.  But not the right color!  So I got out my Annie Sloan paint in country grey and gave her two coats and one coat of dark wax!

IMG_8269

She looks almost like leather now but she was a little flat and needed some bling! (of course)!!!

I started applying upholstery tacks around the edge and ran out so I hung it on the wall so I could live with it a couple of days.

I really liked the finishing touch of the tacks but they were still too “dull”  so I purchased some shiny brass ones!!!

TA DA!!

IMG_8336

IMG_8351 IMG_8346

I love how it “pops” now!  Just enough bling!!!

Morale of this story…..never judge a book by its cover and most important…..

remember to take pictures when you’re doing a project!!

Until next time……..

http___signatures.mylivesignature.com_54492_67_2919C051256D8441C775E700F88490B0